
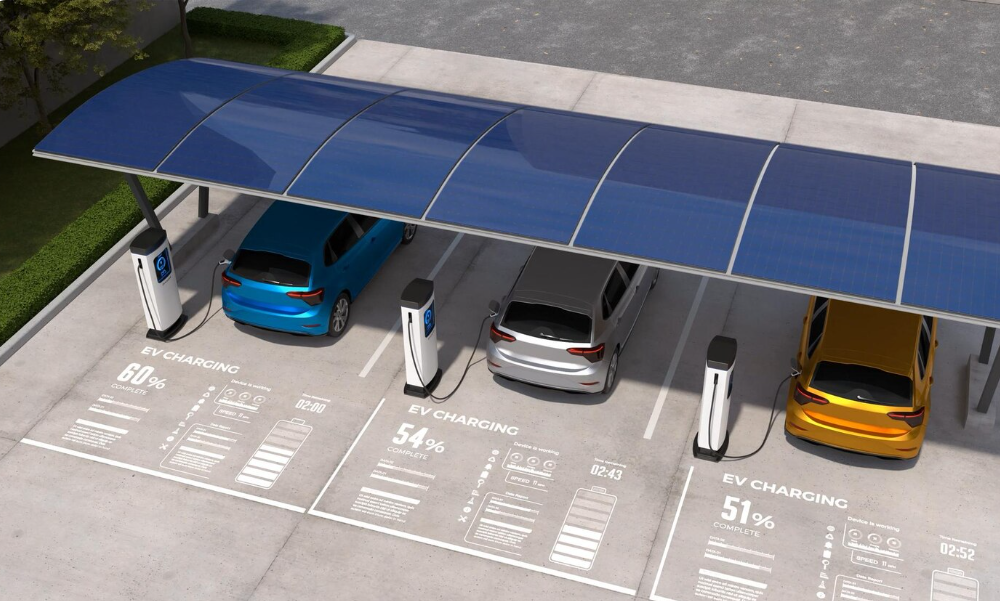
When a company decides to add EV chargers to its parking lot, the first questions are usually about cost and power. But the question that trips up most projects is simpler: will it actually fit?
A charger that looks small in a product photo still needs room for the unit, the cable, the car, the driver opening the door, and a person in a wheelchair reaching the screen. Get those measurements wrong, and you end up with blocked walkways, cables stretched across lanes, or spaces nobody can use.
This guide walks through the real dimensions behind a workplace charging setup, from the size of the charger itself to the spacing between parking stalls. Exact numbers vary by brand and local code, so treat these as typical ranges to plan around, then confirm with your installer.
How Big Is an EV Charger?
Chargers come in two main shapes, and each takes up space differently.
Wall-mounted Level 2 chargers are the most compact. A typical unit is roughly the size of a large shoebox: about 12 to 18 inches tall, 8 to 12 inches wide and 4 to 7 inches deep. They mount on a wall or column, so they take almost no floor space. That makes them a good fit for parking garages and spaces that back onto a building.
Pedestal Level 2 chargers stand on their own post. Most are about 4 to 5 feet tall, with a base footprint of around 1 to 2 square feet. A dual-port pedestal can serve two parking spaces from one post, which saves room and wiring.
DC fast chargers (Level 3) are much larger. Depending on power output, they usually stand about 5 to 7 feet tall, 2 to 3 feet wide and 1.5 to 3 feet deep. Many need a concrete pad, and some higher-power models also need a separate power cabinet nearby.
As a rule of thumb, Level 2 is the workhorse for offices, because employees park for hours. DC fast chargers make more sense for fleet vehicles or visitor spaces where cars need a quick top-up.
Parking Space and Clearance Dimensions
The charger is only part of the footprint. The parking space around it matters just as much.
| Item | Typical size | Why it matters |
| Standard parking space | 8.5 to 9 ft wide, 18 ft long | Most EV spaces use the same size as regular stalls |
| Accessible parking space | 8 ft wide plus a 5 ft access aisle | The aisle lets a wheelchair user get in and out |
| Van-accessible space | 11 ft wide plus 5 ft aisle, or 8 ft plus 8 ft aisle | Needed for side-lift vans |
| Charging cable length | 18 to 25 ft | Has to reach charge ports on either side of the car |
| Screen and connector height | 15 to 48 in from the ground | Common reach range for accessibility rules in the US |
| Clear floor space at the charger | About 30 by 48 in | Room for a person or wheelchair to stand and use it |
Two details are easy to miss. First, charge ports are in different places on different cars: front, rear, driver side or passenger side. If the cable is too short, drivers will park at odd angles or stretch the cable across the walkway. Second, chargers near the front of a space need protection. Bollards or wheel stops placed about 2 to 3 feet in front of the unit keep bumpers from hitting it.
Accessibility rules for EV charging differ by country and state, and they are changing. Check the current rules where your building is before you mark out the spaces.
Planning the Layout of a Workplace Lot
Once you know the sizes, the next step is deciding where chargers go. A few layouts work well for offices.
Back-to-back pedestals. Place one dual-port pedestal between two rows of spaces that face each other. One post can serve up to four cars with the right cable reach. This keeps wiring short and uses the least concrete work.
Wall or column mounting in garages. In covered parking, mount chargers on the wall at the head of each space or on columns between spaces. Keep units high enough to clear bumpers but inside the reach range for the screen.
A cluster near the building. Grouping chargers close to the electrical room cuts the cost of trenching. It also makes the spaces easy to find and easy to light at night.
Room to grow. Most companies start with a handful of chargers and add more as demand rises. Plan conduit and pad space for future units now, even if you only install a few today. Digging up a finished lot later costs far more.
This is where working with a specialist helps. Providers of workplace EV charging solutions usually start with a site check of the building, the electrical capacity and the parking layout before any hardware is chosen. Ampaway, for example, handles permits, installation and setup, and uses load management to share available power across chargers, which can help some sites avoid a major electrical upgrade. A good layout plan from the start means employees get chargers where they actually park, and the lot can grow without a redesign.
If you are budgeting the work alongside other building upgrades, it also helps to get a proper cost estimate early. Our guide on how professional estimating services keep construction projects on budget explains why.
Don’t Forget the Space You Can’t See
The parts of a charging project that take up the most room are often out of sight.
Electrical panel space. New chargers usually need new breakers, and sometimes a new sub-panel. Check that your electrical room has wall space for extra equipment and the working clearance in front of it. In the US, the electrical code generally calls for about 3 feet of clear space in front of panels, and more for higher voltages.
Cable and conduit runs. Power has to travel from the panel to each charger. Underground runs need trenches, while garages often use conduit along walls and ceilings. The longer the run, the higher the cost, which is one more reason to place chargers near the power source.
Transformer and utility space. Larger sites, especially those adding DC fast chargers, may need a new transformer from the utility. That can mean a concrete pad several feet across and clearance around it for maintenance trucks.
Signage and lighting. Each EV space needs clear signs, and good lighting matters for safety at night. Plan pole or wall space for both.
None of these are hard problems, but they are easy to forget until the installer arrives. Measuring them early keeps the schedule and budget on track.
Quick Measuring Checklist
Before you talk to installers, walk the lot with a tape measure and note these points:
- Width and length of the spaces you want to convert
- Distance from each space to the electrical room or main panel
- Wall or column space for wall-mounted units in garages
- Room for at least one accessible space with its access aisle
- Clear walkway space so cables never cross a path
- Free space in the electrical room for new breakers or a sub-panel
- Space for bollards or wheel stops in front of each charger
- Room to add more chargers later
The Bottom Line
A workplace charging project succeeds or fails on details measured in inches and feet. The charger itself is small, but it needs room for cables, cars, people and future growth. Planning those dimensions first saves money, keeps the lot safe and makes the chargers easy to use.
Start with the measurements above, share them with your installer, and build a layout that works for today with space for tomorrow. For more practical guides on cars and driving, browse the automotive section, or see the business section for more on running and upgrading a workplace.
Read More: Haptic Realism: How Next-Gen Feedback Engines Are Enhancing Immersion

1 comment